Install the ALDSP Retail Dataspace Sample. The sample creates a dataspace for retail data services that connects to a relational database and web services.
Depending on whether your are running WebLogic server 10.1 or 9.2 see:
To add the sample functions to the RetailDataspace project:
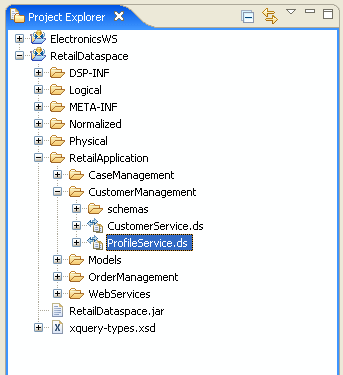
Expand the RetailDataspace project in the Project Explorer, and locate the RetailApplication/CustomerManagement/ProfileService.ds data service.
ProfileService Data Service in the Project Explorer
Double-click the ProfileService.ds data service and click the Source tab.
In the ProfileService.ds data service, add the following functions to the bottom of the Source view:
declare namespace ord= "ld:Logical/Order/Order";
(::pragma function <f:function kind="library" visibility="public" isPrimary="false"xmlns:f="urn:annotations.ld.bea.com"/>::)
declare function tns:getOrderCount($arg as xs:string) as xs:integer {
count( for $b in ord:getOrderByCustID($arg) return $b)
};
(::pragma function <f:function kind="library" visibility="public" isPrimary="false"xmlns:f="urn:annotations.ld.bea.com"/>::)
declare function tns:getOrderCounts($arg as xs:string) as xs:integer* {
for $b in ord:getOrderByCustID($arg) return 1
};
(::pragma function <f:function kind="library" visibility="public" isPrimary="false"xmlns:f="urn:annotations.ld.bea.com"/>::)
declare function tns:getServiceCases($profiles as element(ns5:PROFILES)) as element(ns7:CASE)* {
for $profile in $profiles/ns2:PROFILE
for $b in ns8:getServiceCaseByCustID($profile/CustomerID)
return $b
};
The sample projects call these functions to determine the order count and to retrieve the service cases.
Choose File > Save in the main menu.
Updating the Schema
To update the schema file to support the new functions in the ProfileService.ds data service follow these steps:
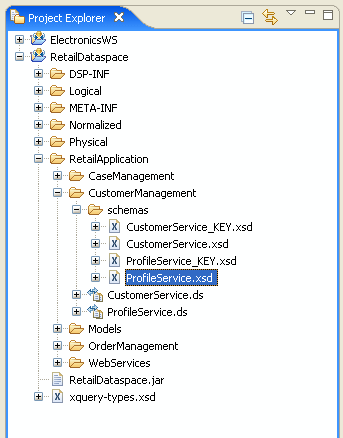
Locate the RetailApplication/CustomerManagement/schemas/ProfileService.xsd schema file.
ProfileService XSD in the Project Explorer
Double-click the ProfileService.xsd schema file and click the Source tab.
In the ProfileService.xsd schema file, add the following lines before </xs:schema> at the bottom of the Source view:
This specifies the PROFILE_SERVICES complex type, which is used by the new functions you added to the ProfileService.ds data service in the previous section.
Choose File > Save in the main menu.
Redeploy the RetailDataspace.
Exporting the Mediator Client JAR Files
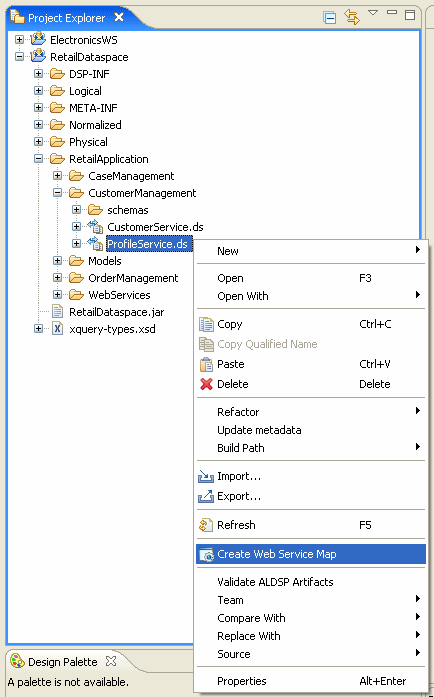
Before exporting the Mediator Client JAR files, you need to create a web service map.
To create the web service map:
Right-click the ProfileService.ds data service and choose Create Web Service Map. Click OK to any information dialogs that may appear.
Creating a Web Service Map
Redeploy the RetailDataspace.
Exporting the Java Mediator Client JAR File
To export the Java Mediator Client JAR file for the project:
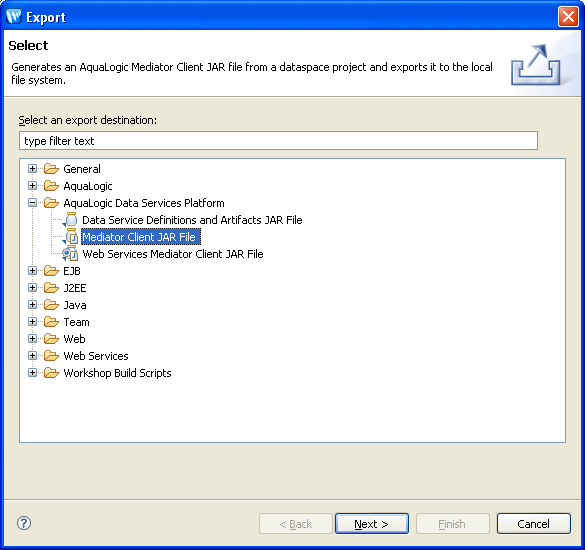
Right-click the RetailDataspace and choose Export.
Expand AquaLogic Data Services Platform, select Mediator Client JAR file, and click Next.
Selecting Mediator Client JAR File
RetailDataspace should be selected; if not, click the checkbox next to that option.
Choose a convenient destination directory for the RetailDataspace-dsp-client.jar file. Then click Finish. WorkSpace Studio creates the Mediator Client JAR file.
A message indicating that your have successfully exported the mediator JAR file and its location should appear.
Exporting the Java Web Services Mediator Client JAR File
To export the Java Web Services Mediator Client JAR File:
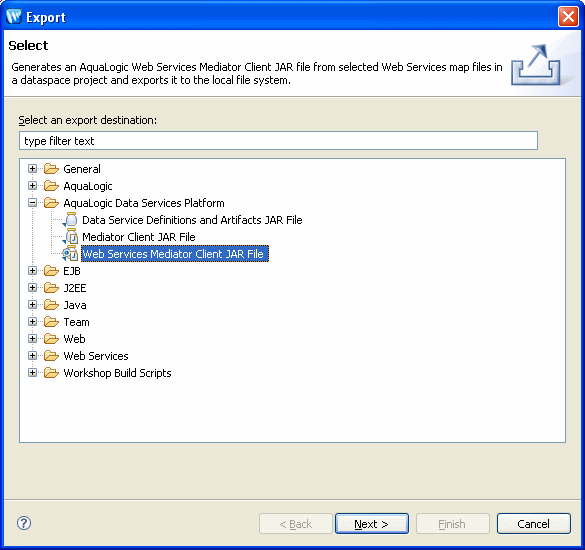
Right-click the RetailDataspace and choose Export.
Expand AquaLogic Data Services Platform, select Web Services Mediator Client JAR File, and click Next. Notice that the necessary projects and folders are automatically selected.
Selecting Mediator Client JAR File
Select a destination directory and click Finish. WorkSpace Studio creates the Web Services Mediator Client JAR file.
A message indicating that your have successfully exported the web services mediator JAR file and its location should appear.
Creating the Sample Dataspaces
The sample provides four dataspaces:
DSPClientSamplesDynamic1
DSPClientSamplesStatic1
DSPClientSamplesControlDynamic
DSPClientSamplesControlStatic
The dynamic and static client samples illustrate use of the Java and Web Services Mediator APIs. The control dynamic and static samples, illustrate use of ALDSP Control APIs.
You can create the four sample dataspaces by dowloading and importing the advanced samples ZIP file.
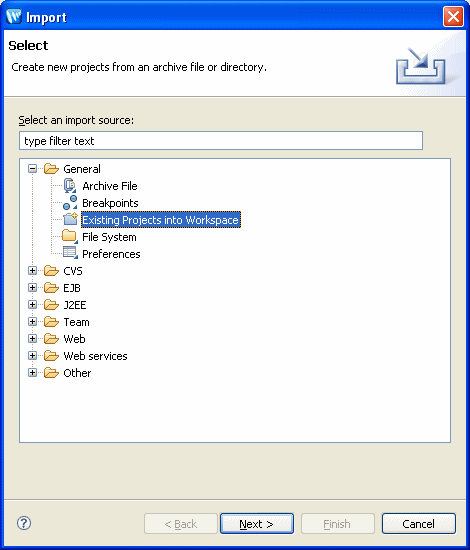
Right-click in the Project Explorer and choose Import.
Expand General, select Existing Projects into Workspace, and click Next.
Importing Existing Projects into the Workspace
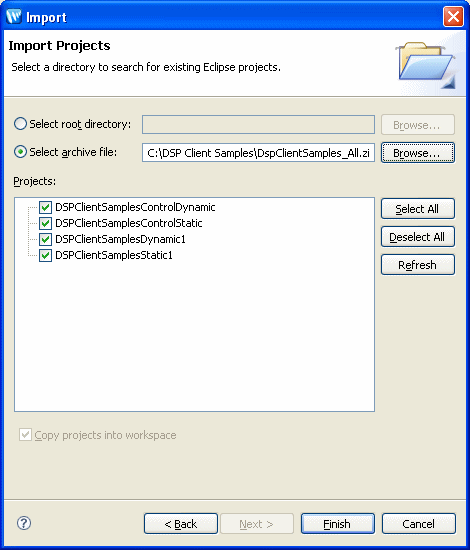
Click Select archive file, click Browse, and open the DspClientSamples_All.zip file.
Selecting the Sample Dataspace Archive
Click Finish. Studio imports the sample dataspace projects.
Adding the Mediator Client JAR Files
To add your mediator client JAR files to the projects:
In the project explorer copy the mediator client JAR files you generated earlier (RetailDataspace-dsp-client.jar and RetailDataspace-ws-client.jar) to the following folder:
DSPClientSamplesStatic1/WebContent/WEB-INF/lib
Click Yes To All when prompted to overwrite the existing files.
Right-click the DSPClientSamplesStatic1 dataspace project, and click Refresh.
Setting the Java Build Paths
You need to set the Java build paths to include the specific JAR files required by the projects.
You need to specify the Java build path for all four dataspace projects:
DSPClientSamplesStatic1
DSPClientSamplesDynamic1
DSPClientSamplesControlStatic
DSPClientSamplesControlDynamic
To set the Java build path:
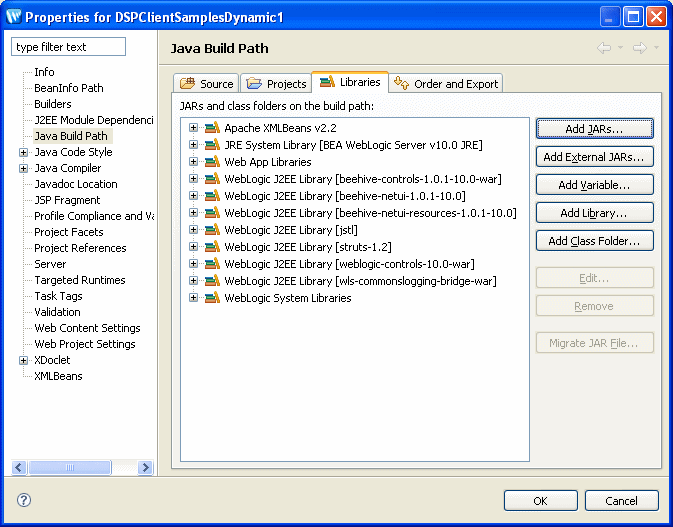
In Project Explorer right-click the dataspace project you have selected, then choose:
Build Path > Configure Build Path
A dialog appears displaying the properties for the dataspace project.
Click the Libraries tab.
Configuring the Build Path
Click Add External JARs..., then locate and select the indentifed JAR files.
Click Open.
Click OK.
The following table identifies the necessary JAR files and their location for each advanced sample dataspace project. (The ld-client.jar file is needed by all four projects.)
When configuring the path for the ALDSP control dataspace projects, you may notice duplicate entries for ld-client.jar and com.bea.sdo.1.0.0.0.jar. If so, retain only the file associated with the location in the above table.
Setting the Run Configurations
You need to create a run configuration for the following projects:
DSPClientSamplesDynamic1
DSPClientSampleStatic1
Setting the Run Configuration for DSPClientSamplesDynamic1
To set the run configuration for DSPClientSamplesDynamic1:
Right-click DSPClientSamplesDynamic1 in the Project Explorer and choose Run As > Run. The Run dialog appears.
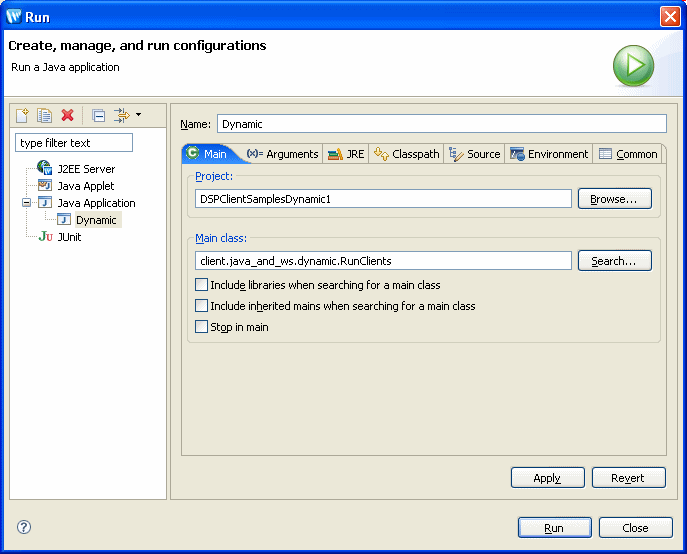
Right-click Java Application, choose New, and type Dynamic as the name of the new run configuration.
Configuring the Run Configuration Main Class
Enter the following in the Main class field:
client.java_and_ws.dynamic.RunClients
Click Apply.
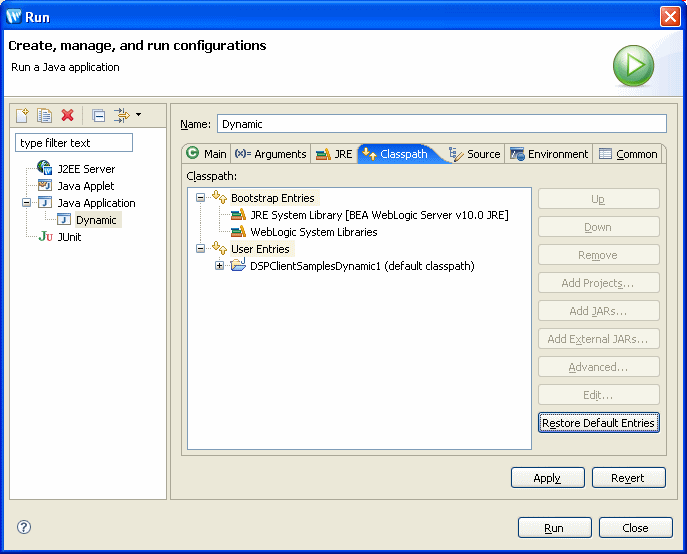
Click the Classpath tab.
Configuring the Run Configuration Classpath
Select Bootstrap Entries > WebLogic System Libraries, and click Remove (if the WebLogic System Libraries entry is present).
Select User Entries
Click Add External JARs
Navigate to:
<BEA_HOME>/wlserver_10.0/server/lib
select the api.jar file, and click Open.
Click Apply.
Click Close.
Setting the Run Configuration for DSPClientSamplesStatic1
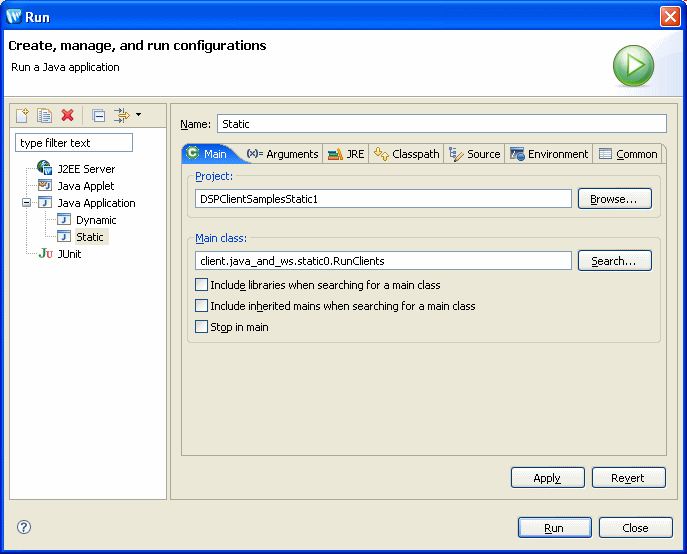
To set the run configuration for DSPClientSamplesStatic1:
Right-click DSPClientSamplesStatic1 in the Project Explorer and choose Run As > Run. The Run dialog appears.
Right-click Java Application, choose New, and type Static as the name of the new run configuration.